Pages

Showing posts with label character: Harley Quinn. Show all posts

Sunday, November 1, 2015

Arkham Knight Harley Quinn!

Halloween at last! And that means I finally got to wear Harley. I took her to O'Connor Brewing Company in Norfolk for Tidewater Comicon's Halloween party, plus we swung by my tattoo place (they were giving out gift certificates to anyone who showed up in costume) and Chipotle ($3 burrito for anyone in costume). Birk apologizes in advance for his photography skills.

Leaving for the party!

I have no reference photos for what HQ's face looks like when she attacks, so I guessed.

I don't have a proper ledge to crouch on, so the stairs will have to do.

I love the industrial look outside the brewery!

Outside O'Connor Brewing Company

Posing with the TARDIS, as one does

Beer and laughing gas bomb, can't go wrong


I know Harley's insane, it's canon, but now I know why...
she puts on all this before doing absolutely anything.

It was super fun being Harley. Sure, it's not a particularly comfortable costume (it includes a real corset plus a corset cover that does NOT breathe, one bra on top of another, wigs always give me a little bit of a headache, plus this makeup means constantly reminding myself not to touch my face). But it's the first one I made on my own (sure, I got help from Birk, but that will probably always be the case... let's be real, I can't even get into one of the pieces of this costume without his help) and I'm pretty darn pleased with it. I have some adjustments and additions before I wear it again (make a new corset from scratch to fit a little better, clean up the edges on the red/black bra, add a few more O-rings to the leather harness) but that'll be sometime next year.

Friday, October 30, 2015

Harley Quinn Wig

Next time I say, "I'm going to dye this wig with Sharpies!" someone should slap me and hide all my Sharpies from me. If I do something like this again, I'll be using the method where you make a dye out of the Sharpie ink and alcohol and submerge the wig in it. But this time, I hand-Sharpied. I consider it a small miracle that I didn't gouge out one of my eyes with one of the Sharpies out of frustration.

The little piece I started with to make sure this was going to work.
(The scariest part by far.)

I used the book to raise the mannequin head so the hair wasn't laying flat on the table.
I taped the head to the book to stabilize it so it wouldn't wiggle around while I worked.

This is what my nervous smile looks like.
The mannequin looks like she's heading to the firing squad.

Work work work

I started each side by making a few marks at the highest point I wanted to color,
so that it would stay relatively straight across.

Ta-da! The red side looks a little too straight across,
but once I comb it out and swing it around a little, that'll break up
and look a little more natural.

Finishing Harley Quinn's Bomb

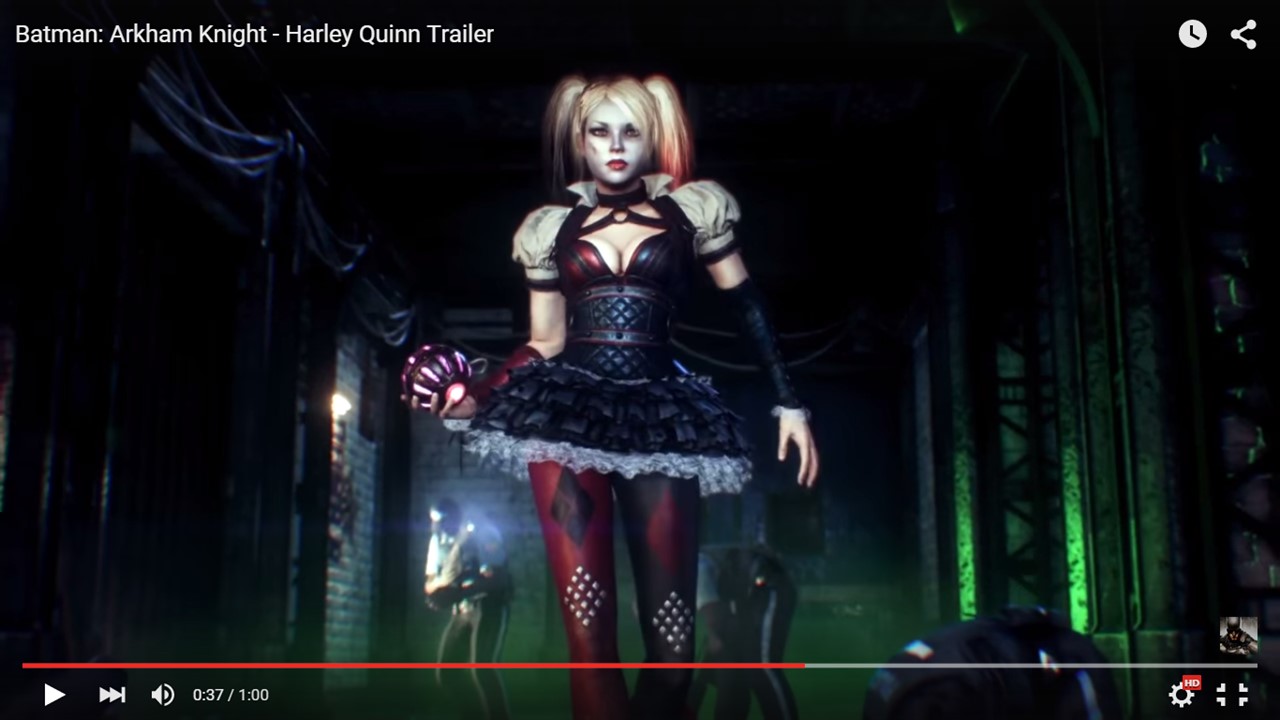
Since I don't play Arkham Knight and I can't find much about this online, I'm mostly guessing that this thing is a laughing gas bomb. But it's my best guess, and I loved it in the shots from the game trailer, and it was just too much fun to make, so I had to have it.

As soon as I decided to make it, I knew exactly what to start with. Did any of you have Splash Out as a kid? It's a mechanism that you put a water balloon into, set the timer, and you play hot potato with it... when the timer runs out, it pops the water balloon, the person holding it gets splashed, and they're out. It looks like this:


And the laughing gas bomb looks like this:


So I ordered a Splash Out on Amazon. (I almost felt a little bad... the seller sent a note with it saying to enjoy it in the last few weeks of summer we had left at the time. Nope, sorry, gonna paint it, fill it with lights, and carry it around on Halloween.)

I can't find any photos of painting it, but I started with a coat of white to cover up the orange and purple, both inside and out. Then I painted a few coats of black on the outside.

This is when I discovered the magic that is EL wire. That's the same stuff I used to make the lights for the Iron Man scale dress, but I ordered and tested the pink wire for this bomb first. I checked the listed measurements for the battery pack and it looked like it would fit, and it turned out that it did.

I coiled the wire up inside and closed it, and it looked like this:


(I also added another coat of black paint after that photo was taken.)

Pretty cool, right? I didn't love that I could see the wire through the holes but I decided that fixing that up would go way down low on the list to make sure I get other stuff done first.

So today, after I made sure all the clothing fit and looked okay, I added vellum paper to the inside to cover the holes and make the light more of a glow than individual lines of wire.


Cutting and inserting the pieces of vellum paper, with tiny pieces of
double-sided tape to hold each one in place.

Taping down the battery pack to the center piece (which originally is supposed to pop the water balloon).

Outside view with the vellum paper in place

The original plan was to be able to turn the light on and off by poking my skinniest paintbrush handle through the holes and poke the button, but with the paper there, I have to twist the ball open to reach the button. No big deal; I'm just trying not to do it too many times so I don't wear off the paint around the opening.

Edited to add: I got a great photo of the laughing gas bomb at O'Connor Brewing Company on Halloween and thought it would be appropriate to add here:


Thursday, October 15, 2015

Distressed Bat

It's really scary to have to distress/age something you've already created. You put in a lot of careful work to make something that looks really nice, and then you have to mess it up on purpose, but equally carefully. It has to be messed up in just the right way. Last night, I finally distressed Harley's bat, and I'm pretty happy with it.

I would assume that the edge of the end of the bat would get a lot of
wear and tear, so I did quite a bit of distressing there.

There's one big spot at the top that seems to have been well-used,
and a smaller area on the flat of the bat where you'd typically
aim to hit the ball (or skull, or whatever you're aiming at as Harley).

A few more little spots. I didn't want to go overboard,
so I just picked a few places that might get used to the point
of wearing off paint, and stopped myself after five or six.

In the reference images, the lines dividing the layers of tape
are very clearly defined. It looks kind of like dirt and grime have
set into it on the edges of the tape. So I colored them black for emphasis.

All I did for distressing it was use a metallic silver Sharpie and my finger to smudge it around quickly before it dried. The tape lines are just black Sharpie (it bled on its own, which I thought looked really cool and gave it a shadow without me doing anything). Also, while smudging one of the spots, my finger slipped and my nail dug a little divot in the side of the bat, since it's just foam. So I silvered it up and made it look like it was damaged in a fight.

So, it was fun, but it was tense. I didn't know if I'd be able to paint over it if I messed up, since I hadn't tested that.

Wednesday, October 7, 2015

More Research = More Work

That moment where you're looking for better reference photos for one piece, and you find out you missed some things on a piece you already finished...

Specifically, I needed images of Harley's back, and I found more images that show different angles of the harness... and I have to go back and add six O-rings (two of which I already knew about). And I was going to leave off one of the straps (the one that goes around the neck and down to just about armpit level in the front) but I'm not sure I can get away with that now. We'll see.

 :
Sure, it showed me I have more work to do on the harness...
But on the bright side, this is a really excellent image.
And it makes me wonder if I want a police hat.
(That doesn't sound right... "police hat." What are they called? A cap?)

Monday, October 5, 2015

Studs/Brads

I learned yesterday, by testing them, that brads are much easier to put in the leather than actual studs. So that's what I'm rolling with.

Problem was, I had small silver ones, and what I needed was large black ones. So I went back to Michael's today and did not find what I needed. What I did find, however, was large brads that look like baseballs. So I decided to get those and paint them.


As you can see, it was going to require a couple of coats. Then I saw something else already sitting out on my sewing table and decided to try it to see if it was more effective...


Nail polish! It was thick enough to cover it with one coat, it's shiny like metal would be, and I'm fairly sure that it won't chip (but I might need to put on a clear coat just in case). I don't think they'll fully dry before I go to bed tonight, so I'll have to work with them tomorrow.

Sunday, October 4, 2015

Harness Weekend

The harness is complete! Okay, I still need to add the studs on two of the straps but that's only because I have silver studs and I need black. But I had a weekend that went from learning how to use a sewing awl to putting on a COMPLETE harness!

Finished product first:


I didn't take nearly enough photos to do a tutorial, but I did take enough to share the journey with you.

I now own a sewing awl, which (and I only thought of this because of all the Walking Dead I've been watching) would make a decent anti-zombie weapon in a pinch.

Have to test it first, of course!

I didn't actually use it for any of the actual sewing, as it turned out, because I was sewing edge-to-edge, and the instructions for the sewing awl showed me how to sew flat side to flat side. So I used the awl to make the holes and I sewed with a blunt needle.

I knew I needed something under the work to keep my sewing table from being utterly destroyed, but I started off with just a few layers of cardboard. So this happened:

(Look very carefully. That isn't dust on your screen, it's little marks all over my sewing table.)

The first thing I sewed on was the snap to the under-bust band.


It may look like there's a lot of waxed thread getting in the way on the right picture, but actually, the snaps were kind of wobbly to begin with, so that solved a problem for me. They snap really snugly and don't pop open too easily. The top picture is the hole I had to bore out for the middle of the "innie" snap (I'm sure they have a technical name but I haven't learned it yet). I made the hole with a combination of the sewing awl, needle-nose pliers, matte knife, and scissors.

Next up was sewing the over-arm pieces to the under-bust piece.


I don't mean to brag, but damn that's some fine spacing and snug stitching, not to mention a tight knot that won't budge a millimeter. (Yeah, I'm proud of my work, what can I say?)

One thing that was kind of a problem until I got into the swing of things was my needles.


This happened twice (but I only took a picture of the first one). I was worried that it was going to be an average of one needle per strap. The problem was that, most of the time, I couldn't pull the needle out of the hole with just my fingers (waxed thread makes your fingers kind of... waxy) so I used the pliers, but apparently I sometimes had too much of an angle on it so they snapped. But I got better at that whole process, and no more needles were sacrificed.


Then I added a snap and the O-ring to the neck band (and modeled it for myself, because photo breaks are an integral part of my creative process). Then I added the bands that I called the clavicle bands (and modeled again).


Then, Birk and I (okay, Birk, because I can't see my own back... it's a personal flaw that I embrace) measured/marked the back of the over-arm bands for where the X on my back needed to go.

Marking where they need to go
(and the circle drawn on my back is supposed to be the O-ring).
Then I attached the X bands to the O-ring
and we taped them into place to make sure
everything lines up the way it's supposed to be.
Seriously, Birk did SO MUCH measuring and lining up and adjusting and taping and Sharpie-ing this weekend, and he deserves a big round of applause.

The arm bands just needed some elastic and they'll hold in place on my arms just fine, so I used some Krazy Glue (which worked spectacularly) and held it in place with binder clips while it dried.


And then I was done! And you've already seen the final product up there at the top.

I'm really proud of this one. I wanted to get this whole thing done this weekend, and I did. I learned a new skill and it turned out really well on the first try. I managed not to injure myself (though my shoulder is pretty sore from all the awling, but so far no bruise) despite all the scary pointy objects involved.

Monday, September 28, 2015

Prototype: Harley's Harness

I don't know what else to call the convolution of leather straps Harley wears in Arkham Knight, so I'm going to call it the harness, because that's what it feels like.

Instead of jumping right in and cutting up all my (expensive) leather, I thought it would be a good idea to make a prototype to make sure all my measuring was correct and that everything looked right when it was attached where it was supposed to be.

I am SO GLAD I did that, because I realized (1) one of the pieces needed to be eight inches longer because I should attach it to the underbust strap for stability, and (2) I need TWO overarm straps, or the back pieces have nothing to attach to on one side. So this was a very valuable exercise and I should always do it when working with expensive-to-replace materials.


So this is part of my prototype, which I made out of the same packaging foam that I used to cover the lights for Iron Man. (That stuff came in VERY handy this past week!) I labelled everything with a Sharpie so I'd know where each piece went and how long I cut it (and if I needed to add notes like "add two inches" or something, I could write it right on there). Then I taped everything together, including the (not yet spray-painted) O-rings where needed. I made marks on the tape where I'd be adding snaps or elastic or Velcro so I'd know what I could and couldn't un-tape to get out of it. (I would be the person who makes an absolutely perfect piece and then realizes she can't put it on or take it off.) And from doing the prototype, I discovered that there's one less place I need to add a fastener (it will slip over my head after I undo the collar piece), which is awesome, because I expect that to be quite a pain.

I've cut the leather now (and I have ONE spare belt blank in case I need to re-cut something) and painted the edges red, so everybody cross your fingers and hope that it all fits together the way it did in my prototype!

Sunday, August 30, 2015

Countdown to HQ: 39/60

I haven't been making great progress with Harley yet, so I needed a checklist. And here it is!

Note the bottom right: 40 tasks, 60 days
First, I made a list of the pieces and what has to be done to make them happen. Then I divided that list into tasks that can reasonably be done (by me) either in an evening after work or in a day on the weekend. Most of them are easier/shorter since most of the days I have left are workdays. Anything that could boil down to "buy a thing online" was set aside and put in the box in the middle right, and they don't count as tasks. Most of the tasks are things like "pattern/measure X," "cut X," "sew X," and then the non-sewing things like painting the bat, a boot, adding studs to things, dyeing my wig, etc.

And I already got one down for today!


You can compare the lists, or I can just tell you: I got the pattern cut for the leggings. I figured it was a good one to get out of the way because (1) I need space to stretch it out and cut it (it should be the largest single piece of anything I need) and (2) it's only one pattern piece so I don't need to worry about losing pieces or getting them separated. Even so, I used a big binder clip and put it, a note with what it is written on it, and the pattern (back in the envelope) all together so it stays together. Now all I need is the fabric for that, and I can get to the next leggings step (cutting the fabric pieces).

You may also notice there's a piece erased from the purchases box: the ball! I finally bit the bullet and spent $30 on a cosplay prop. I could have spend $15 on one that didn't look perfect, but... well, I didn't. I can't wait for it to arrive so I can paint it and play with lights!!!

Sunday, August 16, 2015

Tulle Time

For the underskirt poof for Harley, I decided to make a no-sew tulle skirt; it seemed like the easiest route. This means I need lots and lots and lots of 2"-ish wide strips of tulle. Fun facts about tulle: it likes to grab onto itself, the slightest breeze or hint or static electricity sends it flying across the room, and white tulle is kind of hard to see in the poor lighting I have in my craft area for now. So I came up with a solution.


Since I had a cold a couple weeks ago, we only had like two tissues left in this box. So I pulled them out and stuffed all the tulle strips inside, so I can pull them out one at a time as I tie them onto the elastic for the skirt, without having to fight back a pile of them or knocking some of them to the ground to taunt the cat. And here it is in action:


I also labelled it on the side so Birk doesn't accidentally throw it away in an attempt to be helpful and clean up. The label includes the length in case I forget before I buy more tulle (I need about four times what I started with) or misplace my notebook with all the measurement notes in it.